Have you ever come across Bisquick? If you’re from the U.S., chances are it’s been a pantry staple for years. But if you grew up outside the States—like I did, in Eastern Europe—your introduction to Bisquick may have been through quirky TV commercials, showcasing it as a sort of “magic powder” that made pancakes, biscuits, and muffins practically bake themselves. It seemed impossibly easy, and to a kid watching from across the ocean, a bit like culinary sorcery.
Fast forward to today, and Bisquick still carries that aura of kitchen convenience. But what’s the story behind this beloved baking mix? I recently dove into its origins, and as with many beloved food inventions, there’s a hint of legend mixed in with the facts.
A Bit of Bisquick History
Back in the 1930s, a traveling salesman for General Mills, one of America’s major food companies, had an unexpected culinary revelation. While on a train journey, he was served fresh, warm biscuits alongside his coffee—crisp on the outside, soft on the inside, and impossibly fresh for something served on a moving train. Naturally intrigued, he asked to meet the chef responsible.
The train’s chef shared his secret: a pre-mixed blend of flour, salt, baking powder, and lard that he prepared ahead of time and kept chilled on ice. With this ready-to-go base, baking biscuits on the fly became quick and consistent. The salesman saw the potential immediately. A few product development meetings later, Bisquick was born, hitting American grocery store shelves with the promise of convenience without compromise.
While the story has a fairy tale feel to it—complete with a chance encounter, a hidden recipe, and a touch of innovation—it highlights a bigger truth: simplicity in the kitchen can be revolutionary.
Why Make Your Own Bisquick Mix?
Now, the original Bisquick contains hydrogenated oils and preservatives to give it a long shelf life. That’s perfectly fine if you want maximum convenience. But if you’re more ingredient-conscious—or if you just love DIY kitchen hacks—making your own Bisquick-style baking mix is incredibly easy and healthier, too.
By using just four ingredients—flour, salt, baking powder, and cold butter—you can whip up a homemade version of the classic mix. Store it in the freezer, and you’ve got a shortcut to biscuits, pancakes, waffles, and more, all without the additives.
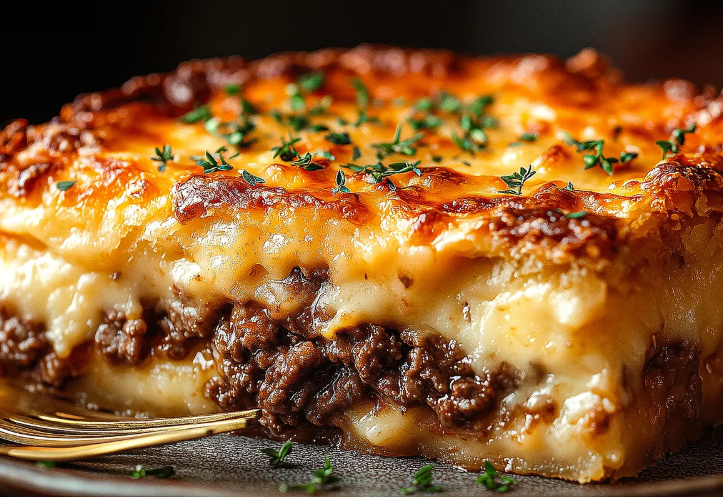
It’s also a great base for savory bakes—like this next-level recipe I’m about to share: Cheeseburger Cake. Yes, you read that right. Imagine all the goodness of a cheeseburger baked into a fluffy, savory pie. It’s hearty, cheesy, and weeknight-dinner worthy. Let’s get into it.
Cheeseburger Cake Recipe
Ingredients:
For the Filling:
- 1 lb (450g) beef mince (around 7% fat)
- 2 shallots, finely chopped
- ½ teaspoon salt
- ½ teaspoon black pepper
- ½ teaspoon taco seasoning (optional, for extra depth)
- 1 cup (120g) freshly grated cheddar cheese
For the Batter: You can use either store-bought Bisquick or the homemade version.
Option 1 – Using Bisquick:
- ½ cup Bisquick Original Pancake & Baking Mix
- 2 large eggs
- 1 cup (240ml) whole milk
Option 2 – Homemade Bisquick Mix:
- ½ cup (65g) all-purpose flour
- 1 teaspoon baking powder
- ½ teaspoon salt
- 2 tablespoons cold butter (cut into small cubes)
- 2 large eggs
- ½ cup (120ml) whole milk
Utensils:
- Frying pan
- Chopping board
- Knife
- Cheese grater
- Spatula
- 9-inch pie dish
- Large mixing bowl
- Whisk
Instructions:
1. Prepare the Filling
Start by heating a frying pan over medium heat. Add the ground beef and break it apart using a spatula. Cook for about 5–7 minutes until it starts to brown. Add the chopped shallots, salt, pepper, and taco seasoning (if using). Stir occasionally and continue cooking until the meat is fully cooked and the shallots are soft.
Once done, remove from heat and let it cool slightly. Stir in the shredded cheddar cheese while it’s still warm—this will help the cheese melt into the meat mixture, making it extra rich and flavorful.
2. Make the Batter
If you’re using store-bought Bisquick, simply whisk the Bisquick mix with the eggs and milk until smooth.
If you’re making the homemade version, combine flour, baking powder, and salt in a bowl. Using your fingers or a pastry cutter, rub the cold butter into the dry ingredients until the mixture resembles coarse crumbs. Then add the eggs and milk, whisking until the batter is smooth and slightly thick.
3. Assemble the Cheeseburger Cake
Preheat your oven to 375°F (190°C). Grease a 9-inch pie dish with a bit of butter or cooking spray.
Pour half of your batter into the dish and spread it evenly along the bottom. Then, layer the beef and cheese mixture evenly over the batter. Finish by pouring the remaining batter on top, gently smoothing it out so it covers the filling.
4. Bake
Place the dish in the oven and bake for 25–30 minutes, or until the top is golden brown and a toothpick inserted into the center comes out clean.
Let it cool for 5–10 minutes before slicing. This gives the layers a bit of time to settle and makes cutting easier.
Serving Suggestions
This Cheeseburger Cake makes for a cozy dinner served with a side salad, roasted veggies, or even some pickles to stay true to the burger theme. It’s also great for meal prep—leftovers store well in the fridge and reheat beautifully in the oven or microwave.
Final Thoughts
It’s easy to see why Bisquick became a sensation—it simplified baking and turned complex recipes into quick creations. But the beauty of food is that even the most convenient shortcuts can be recreated at home with just a few ingredients and a bit of know-how.
So whether you’re channeling your inner train chef or just looking for a fun new dinner idea, give this Cheeseburger Cake a try. And maybe next time you see Bisquick on the shelf, you’ll smile knowing its story—and your homemade version waiting in the freezer.